We are excited to launch a whole new series of short lecture/demo and project classes. The Bernina Creative Studio has 4 streams, covering a variety of sewing, quilting, embroidery, and software topics. Each stream has a virtual monthly class. You can sign up month to month, in any stream you like or the whole year for each stream or all 4 streams of 48 classes.
Our first class in each stream will be free for all to watch, to access the project files, class notes, etc. you will need to officially register.
How to Register:
1.Pick and choose month to month what classes to take – each class is $15 – total of 48 available between all 4 streams.
- Pick and choose month to month what classes to take – each class is $15 – total of 48 available between all 4 streams.
- Pick a stream and sign up for the whole year $125 (save $55 by registering for the full stream). With a Full Year registration, you will have access to both the Bernina Video and our recorded class session for all 12 classes in the stream. Each month’s files will be made available 2 days prior to class date.
- Sign up for all 4 streams for the entire year ($125 – each) and we will give you a $100 discount. So, 48 classes for $400! (Best Value)- you will have video access to all classes and receive instructions and project files for all 48 classes.
The Streams available are:
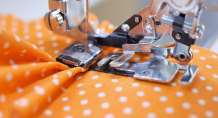
Technique Stream – Classes Running 2nd Friday of each month – 10am to 11:30am (1.5hrs/month)
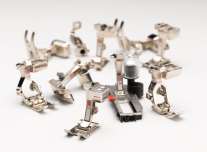
Topics: Overlocker techniques, Presser Feet techniques, and Quilt Finishing techniques
Embroidery Stream – classes running 2nd Friday of each month – 11:30am to 1pm (1.5hrs/month)
Topics: In the Hoop, monogramming, patches, edge to edge quilting, etc
*Project notes written specifically for Bernina, but design files come in many formats and skills learned can be applied to ANY machine brand. We will offer extra advice for our Brother Clients.
Project Stream – Classes running 3rd Friday of each month – 10am to 1pm (3hrs/month)
Topics: Simple projects – pincushions, mini zippered pouches, bed runner, and much more.
Software Stream – classes running 3rd Saturday of each month – 10am to 1pm (3hrs/month)
Topics: Using Bernina V8 DesignerPlus software to digitize quilting, pattern backgrounds, logos, stumpwork, cross-stitch, photostitch and more. We can discuss workarounds for earlier versions if available.
All Classes Offered
Month 1
Project Month 1: Catch-all Pincushion with Hayley Grzych
This super-utility cushion will hold your pins, binding clips, and catch your trimmed threads. Learn how to create your new stitching companion and all the BERNINA feet and accessories to help you get the job done in a breeze.
Embroidery Month 1: In the Hoop Cork Pouch with Judy Hahner
You’ll love this in-the-hoop project! Learn about incorporating specialty materials like cork and vinyl into your embroidery projects to get successful results.
Technique Month 1: Overlocker Multi-purpose Foot with Jaime David
Make piping, add beads and install zippers—you can do it all with one terrific presser foot, the multi-purpose foot. The multi-purpose foot, is a versatile foot that can be a great investment to make complex applications a little easier. In this lesson, you will discover how this foot can enhance your capabilities using an overlocker.
Software Month 1: Back to Basics with Quilting
The Quilter program is a powerful tool for designing your own quilts. You can import fabrics, add embroidery or applique, and design your own quilting designs. Let’s explore what the Quilter program can accomplish!
Month 2
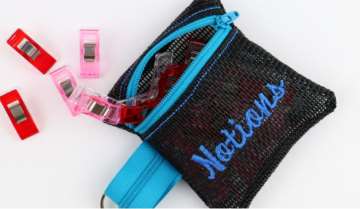
Project Month 2: Mini Hexie Zipper Pouch with Hayley Grzych
Whip up a cute, hexagon zip pouch with your overlocker in a snap! Use this mini pouch to hold your loose change, headphones, or a lip balm and you can even add it to a keyring. Constructing and finishing has never been easier than with your BERNINA overlocker!
Embroidery Month 2: Personalized Napkin Ring and Name Cards with Sylvain Bergeron
Nothing says “welcome to my table” like a personalized napkin ring. Using built-in embroidery lettering in your BERNINA, quickly create lettering for each ring. Add a buttonhole, and you have a ribbon pass-through opening to form the ring. You’ll love this fun and festive project!
Technique Month 2: Embroidery Foot #6 and Clear Embroidery Feet #39/39C with Debbie Cacciamani
The Embroidery Feet #6 and 39/39C have unique properties that offer you beautiful, fun, creative options. In this BERNINA Creative Studio lesson, learn several decorative stitching techniques using cords, wires and more!
Software Month 2: Artwork Canvas Basics
Let’s take a look at some of the unique features of Artwork Canvas and what it adds to your embroidery capabilities.
Month 3
Project Month 3: Cathedral Window Quilt with Denise Jones
Have you ever admired a Cathedral Window Quilt but thought it would take too much time? Learn to create this quilt with a large block and some not so traditional fabrics. No hand work required.
Embroidery Month 3: Shape a Design Throw Pillow with Judy Hahner
Explore the BERNINA Shape Designer! Pick a piece of your design and bring it into the Shape Designer to create a new design. Use basic editing features on the embroidery machine and you’re ready to stitch.
Technique Month 3: Scalloped Bindings with Nina McVeigh
Finish your quilts with a beautiful scalloped edge. Learn to cut the right scallop shape and the steps to be successful. We’ll bind the scallop edge with the BERNINA Bias Binder.
Software Month 3: Creating with Patterns
We will look at what to consider when creating pattern runs and fills as well as how to create patterns that can be used for knock down backgrounds for terry cloth and for a background for free-standing lace.
Month 4
Project Month 4: Bed Runner by Denise Jones
Add flair to your room with this simple but stunning bed runner. This lesson will include a traditional block with a twist. Have fun learning a new block without the commitment of a large quilt!
Embroidery Month 4: Embroidering Personalized Patches with Judy Hahner
Iron-on patches are fun and easy to make. Learn the process to embroider a patch and the proper supplies that will give you successful results. Whether you use a purchased patch design or create your own, patches can be a simple and creative way to showcase your personality, on everyday items.
Technique Month 4: Overlocker Blindstitch Foot with Jaime David
Have you ever considered using the blindstitch foot to sew the perfect edge? Learn the difference between the two sizes of blindstitch feet. A fun application is to use this foot with a flatlock to create a unique looking ladder hem found in ready-to-wear clothing. Just because it’s call the blindstitch foot doesn’t mean you have to make a blind hem. Learn how to achieve a great looking pintucks on woven and knit fabrics. You can use this technique to embellish your fabric to create everything from heirloom yokes to t-shirt panels and pillow tops.
Software Month 4: Creating Logos
In Artwork Canvas, we have several tools for converting bitmap images into vector images. Let’s look at some of these tools and how we decide which one to use in the creation of a logo design.
Month 5
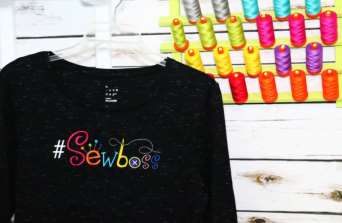
Project Month 5: Sassy Kitchen Towel with Heather Lofstrom
Jazz up a plain kitchen towel with this fun project. Add a Cooking Quote with machine embroidery. Embellish with fun fabric, rick rack trim, and a ruffle. Any cook would love to have this fun addition to their kitchen.
Embroidery Month 5: Monogrammed Cork Key Chain with Sylvain Bergeron
Find your keys…in style! Using machine built-in lettering, we’ll create a monogram and stitch it on cork, a versatile and durable material for everyday use. The included circle design will be the key to the project. You’ll want to make one of these for yourself and everyone on your gift list!
Technique Month 5: Pintuck Feet #30, 31, 32, 33, and 46 with Debbie Cacciamani
Originally, pintucks were designed as an heirloom sewing technique, but in this lesson, you will learn several other fun applications. Pintucks can be created with various fabric weights and cords for added dimension and interest. Learn how to add beautiful pintucks to your next project!
Software Month 5: Multi-Hooping
Yes, it is possible to do a design larger than your embroidery hoop! Learn the basics of multi-hooping and how to apply it to your own projects.
Month 6
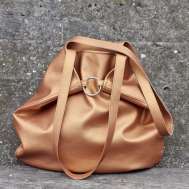
Project Month 6: Big Bag with Heather Lofstrom
This Big Bag is perfect for a day at the beach, shopping, or taking items to a retreat. Made from either laminated cotton or oilcloth, this bag will be your go-to. Learn how to work with unique fabrics and webbing straps to make the Big Bag.
Embroidery Month 6: Quilting Edge to Edge in the Hoop with Judy Hahner
Yes, you can quilt in the embroidery hoop! Use Endless Embroidery and Pinpoint Placement to perfectly stitch an edge to edge continuous quilting design.
Technique Month 6: Decorative Stitch Binding with Nina McVeigh
This is a perfect finish for a totally machine-stitched binding. Learn how to exactly place the Decorative Stitch to enhance the bound edge, creating a special finish.
Software Month 6: Choosing Artwork for Digitizing
Let’s talk about different types of artwork and how you make decisions on how to process artwork into stitches. Learn the best method to use for your art, and how to handle sketched designs and photographs. You’ll discover tools in Artwork Canvas that can help prepare artwork for digitizing.
Month 7
Project Month 7: Travel Cord Organizer with Hayley Grzych
Never waste time untangling your cords again! This travel organizer will keep things tidy when you’re on the go. Learn tips for sewing with elastic and an extra easy button closure.
Embroidery Month 7: In the Hoop Scissor Holder with Judy Hahner
This in-the-hoop embroidered scissor case is the perfect size to keep any pair of scissors safe and sound in your sewing room. Personalize the design using the editing features available on the embroidery machine – quick, easy
and so creative!
Technique Month 7: Overlocker Elasticator Foot with Jaime David
The elasticator foot for your BERNINA and bernette model overlockers can add just the perfect amount of stretch to your elastic as you stitch it in place. This clever foot is great for making crib sheets, ironing board covers, or simply installing narrow elastic around an opening or pocket. Even better—you can use the bernette elasticator foot on the b42 coverstitch machine as well! In this lesson, you will learn the various applications and gain an understanding for how to operate the presser foot with ease. Get ready to add elastic to all the sewing things!
Software Month 7: StumpWork
Learn to create a Stumpwork design from beginning to end. We’ll discuss how to create the design and how to stitch it.
Month 8
Project Month 8: Baby Change and Play Mat with Hayley Grzych
The perfect gift necessity for any new parents in your life—an on-the-go mat for quick changes or laying baby down to play! With a little bit of serger patchwork, this project sews up quickly on your BERNINA Overlocker. We love an easy handmade gift that’s ready for lots of love, wash, and wear.
Embroidery Month 8: Freestanding Lace Applique with Judy Hahner
Freestanding lace embroidery designs combined with an applique element create unique projects that can even be three-dimensional! Fill your hoop with lace and create this pretty lace ornament.
Technique Month 8: Non-stick Feet #52/52C/52D, 53, and 56 with Debbie Cacciamani
The Non-Stick Feet are very useful because the sole of the foot is coated so that it glides easily over “sticky” fabrics, like vinyl, suede and leather. In this BERNINA Creative Studio lesson, learn how easy it is to sew on challenging fabrics by simply using one of the Non-Stick Feet!
Software Month 8: Digitizing CutWork Designs
In this lesson, we will explore how to create a CutWork design from beginning to end, as well as how to use the CutWork Tool for embroidered cutwork and heirloom embellishments.
Month 9
Project Month 9: Quilted Zipper Bag with Vinyl Window with Denise Jones
Quilting and clear vinyl make a great combination in this small bag. Quilt the fabric add the clear vinyl and a zipper and you have your new favorite bag!
Embroidery Month 9: Show Your Love of Sewing Pincushion with Sylvain Bergeron
Celebrate the sewing tradition by making something beautiful and practical out a sewing-themed embroidery design. Beginning with a heart-shaped embroidery design, we will use BERNINA Embroidery Software V8 to create an in-the-hoop project, transforming an embroidered layer into a pincushion. We will consider stabilizers and review the simple tools in V8 Software that truly make this project a cinch.
Technique Month 9: Binding with a Yarn Edge with Nina McVeigh
Learn to bind with a yarn edge – this finish will surprise you. Everyone will think you bought an expensive fold over wool braid! Great on clothing or your wool projects.
Software Month 9: Multi-Media
With the inclusion of CorelDRAW in our software, we have lots of opportunity to mix pictures with stitching. Let’s investigate some of these combination possibilities.
Month 10
Project Month 10: Felted Pillow with Denise Jones
Love pillows? Who doesn’t? They are the perfect canvas for all things creative! In this project, you’ll explore felting as you felt a word into the background of your project using the BERNINA Needle Punch Set #45.
Embroidery Month 10: Embroidered Hot Pad with Sylvain Bergeron
Hot pads are a favorite item to use and create! Easy to sew, they can be any size you need them to be and you can decorate them any way you like! You’ll love adding embroidery to this useful item.
Technique Month 10: Decorative Threads on the Overlocker with Jaime David
One advantage to an overlocker is that the large looper eye accommodates many thick and decorative threads that can be hard to use in a standard sewing machine. In this lesson, we will experiment with many decorative threads including thick and thin decorative threads and various quilting threads too. Learn how these stitches look and use them in your next project.
Software Month 10: Cross Stitch
Cross stitch doesn’t have to be by hand! Learn how fun and easy it can be to create cross stitch designs with your software.
Month 11
Project Month 11: Gingham-inspired Oversized Pot Holder with Heather Lofstrom
This fun and useful project is perfect for gift giving. Learn how to lay out your design so that it looks like custom made gingham. Use your Walking Foot #50 for a little quick quilting and you have a great stash busting gift.
Embroidery Month 11: One-of-a-kind Greeting Card with Sylvain Bergeron
Embroidery adds dimension and texture to a greeting card, bringing that extra distinctive touch. Learn how to stitch on paper (or cardstock) with just a few preparatory steps. Stitch out additional motifs as accents for your cards. This program will have you celebrating with your embroidery machine!
Technique Month 11: Cording Feet #22 and #25 with Debbie Cacciamani
The Cording Feet #22 and #25 are designed to create beautiful couching, guiding several cords at the same time under the foot. This process is great for adding texture and dimension to any project. In this BERNINA Creative Studio lesson, learn decorative couching techniques to prepare and design beautiful fabrics for your next project.
Software Month 11: Manual Digitizing 101
Sometimes it takes a manual touch to get exactly the look you want for your designs. Learn the manual digitizing tools in this informative lesson.
Month 12
Project Month 12: Pet Collar with Heather Lofstrom
Give your furry friend a fun and funky custom collar. Learn how to make a custom pet collar using reflective thread. Or just add decorative stitches to jazz up a piece of webbing for a custom look. Bonus: Matching owner key fob!
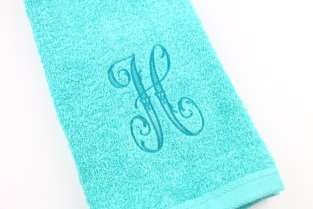
Embroidery Month 12: Embroidered Tea Towel Border with Sylvain Bergeron
Go from simple towel to designer item in just a few steps with an embroidered border design. Learn how to combine a design into a border motif, size it and place it on the towel using Pinpoint Placement or Absolute check, both BERNINA features designed to simplify your embroidery projects. We’ll review stabilizer choices and offer tips for easy embroidery on tea towels. Get ready to make some gifts. Easy to make gifts, that is!
Technique Month 12: Piped Binding with Nina McVeigh
A well done bound edge creates a beautiful finish, but why not take it “up a notch” and add piping to the binding? A piped binding will create a WOW finish to any project.
Software Month 12: PhotoStitch
PhotoStitch turns your photographs into embroidery creations! In a few clicks, you’ll be building beautiful designs.
#148, 8228 Macleod Trail SE, Calgary, Alberta, Canada T2H 2B8
Phone: 403-252-3711
Hours: Tuesday – Saturday, 10:00 a.m. – 6:00 p.m., Closed Sunday, Monday and Holidays
© 2021 MY SEWING ROOM
This content is protected by copyright laws. Reproduction and Distribution of the content without written permission is prohibited.